Thursday, July 31, 2014

Help...My Planner Is Broken

Okay, maybe it's not MY planner that is broken, exactly. Of course, there have been weeks when my planner just wasn't working for me. And I often hear confessions from my fellow Plannerds.

"I haven't touched my planner in a week." -You Know Who You Are

"My planner isn't working. I need to go spiral." -Random Friend

"My planner isn't working. I need to go [bigger, smaller, ring bound, etc.]" -Same Random Friend

If your planner literally breaks, you can replace it. But if it's broken in a metaphorical sense, fixing it can eliminate stress, ensure success, and change your day-to-day life. To fix it, you just need to find the source of the problem.


*Planner Not Big Enough

PROBLEM: Sometimes, your planner just doesn't have enough space.

SOLUTION: It is not shameful to add a section, add sticky notes, or add a bigger planner to your collection. Just be careful that you really do need the space. For example, I don't have regular clients right now as a corporate lawyer. But when I was a criminal defense attorney, I saw clients all day long. Just to write down appointments, I needed a bigger planner. Upgrade if you must, but be realistic and choose the smallest size planner that will work for you.

*Planner Not Small Enough


PROBLEM: A major hurdle for a lot of people is that their planners are too bulky or heavy to carry.

SOLUTION: Consider a smaller planner, but be mindful of the sections. I've streamlined my tabs to dashboard, projects, calendar, future, and files. If you can do that, you might get away with a smaller planner.

*Planner Needs Have Changed

PROBLEM: Even if you don't need a different size planner, when you graduate, have a baby, or make any major life changes, you might need to rethink your needs.

SOLUTION: Start a list (in your planner) of what is working and what is not working. Add things that you wish your planner handled better. Using that list, rework your planner set-up.

For example, when I entered law school, my life revolved around deadlines. Before that, as a teacher, dates were much more important. Tuesday - turn in lesson plans. Friday - meet with principal. But as a law student, we had a massive reading list every day. After a while, it became clear that I needed a homework page instead of just tracking on my calendar. Now, as a lawyer, my much less frequent due dates are written on my calendar again.

Join the conversation about planner problems and beyond - focusing on getting your life in order - at Giftie Etcetera on Facebook. We can help you with solutions. Give us your wish list and we'll give you ideas!

*Planner Is Someone Else's Style

PROBLEM: Sometimes, Plannerds get so involved in Facebook groups and blogs that they end up copying ideas that don't really fit the individuals. (Yes, I just told you to join my Facebook group. Yes, I understand the irony.)

SOLUTION: If it is not working for you, get rid of it, even if the idea is brilliant. (Find some of my most brilliant ideas here. Only use the ones that work for YOU, though.)

*Carrying Case Is Too Small/Uncomfortable

PROBLEM: Sometimes, your briefcase, purse, or tote bag is just too small for your planner, even though your planner is the smallest you can get away with.

SOLUTION: Stop buying tiny bags. Stop buying huge bags where everything gets lost. Stop buying bags with uncomfortable straps.

I have a convertible backpack (the purple/pink one pictured in the sidebar), a work tote (with a nice padded strap), and a more formal purse. All of them fit my planner. Usually, my planner lives in the purse. The only exception that I make is the "little black dress" exception. If I am wearing the equivalent of a little black dress, I leave my planner in the car and carry a tiny purse. (Actually, I'm more likely to just hand my husband my phone and I.D. for his pockets! He HATES that. :) ) If I get a second purse (say, in a different color), it also fits my planner. Guys, if you are the planner sort, you are probably the man bag sort, so this goes for you, too.

*Planner Has No Home(s)

PROBLEM: If you don't know where your planner is, you won't use it.

SOLUTION: Have a dedicated home for your planner. In my house, that means the table next to the couch, my desk, or in my purse. That's it. Three places to look. I never lose it.

TIP: Buy a nice recipe book holder for home and work. Open your planner to today's date and leave it there. You'll never lose it again.

*Planner Has Lost Her Focus

PROBLEM: In this case, YOU are the planner. It happens to everyone. You use your planner every day, like clockwork, and then, suddenly, you don't. At first, you get by. You manage to remember about the dentist. You get a present for the birthday party. But, one day, something slips through the cracks. You did not remember about the doctor and now you owe a "missed appointment fee." You don't turn in a project at work. Things start to spiral out of control.

SOLUTION: This solution is a little more complicated, but it's the most important. So pay attention.

1. Brain dump - Put everything that you remember on a piece of paper in your planner.

2. Resolve - Promise yourself that, from this moment on, you will write everything in your planner. And do so.

3. Daily Alarm - Set an alarm, twice a day, to look in your planner. When the alarm goes off, read what is on your calendar and task list.

Repeat these three steps daily until you are back on track.

Etcetera.

Wednesday, July 30, 2014

Planner Page Perfection

One of the reasons that I rarely plan electronically is because I can't control the page enough in something like Outlook or a shared Google calendar. So I search endlessly, instead, for my favorite paper set-up.

The reality is...you are not going to like this...there is NO PERFECT SET-UP.

Shhh. It's okay. Take a moment and calm yourself.

Because, you see, while there is such a thing as the perfect planner page, the one that serves you and your needs is already very close to perfect.


For me, this week, that meant a combination of a weekly and a daily page. Plus, it meant lots of very visual scratch-outs, so whatever is left to do pops out at me.

Next week, it might mean tracking water consumption or workouts. Perhaps I need to track time spent working or what outfit I need to wear. Maybe I use my planner pages for menu planning.

Planner page perfection just requires a few things:

1. a general set-up that makes YOU visually happy (with color or lack thereof);

2. a layout that makes sense to YOUR brain; and

3. creative uses of your set-up.

Creative uses for your planner pages are the key to going beyond the bland entries in a electronic calendar.

For example, track water right there on the dated entry by writing a small number for each glass that you drink - 1, 2, 3....

Or use my sticker solution for your daily tasks.

Add your menu plan to the top of the page, the bottom of the page, or next to each date.

Give your task entries context codes.

Doodle. It helps cement your thoughts in your brain.

Divide and conquer (something that is virtually impossible to do with an electronic calendar).

Planner page perfection is not about the neatest, cleanest, and most color-coded page out there. It is about a page that works for you AND you working the page.

Happy planning! Join us in the Giftie Etcetera Facebook group to talk about planners (even electronic ones) and everything else to keep your life in order.

Etcetera.

Monday, July 28, 2014

Back-To-School Revisited

Back-to-school season is upon on in Louisiana.

In celebration, please check out my two favorite back to school posts by clicking on the links below.

Launch and Land Zone

Organize Your Kid

Come talk about back-to-school planning (for parents, teachers, and students) in the Giftie Etcetera Facebook group.


Etcetera.

Sunday, July 27, 2014

Scheduling In A Planner

I write often about my love of weeklies and monthlies in my planner. Dailies just take up too much space and don't give me the overview of my week that I depend on.

But sometimes, I need a daily page. Often, I simply use the graph paper from my dashboard and set up a special page between my weeklies. Or I add a large sticky note. That works if it's a busy day because I have a lot of errands or have to pack a lot of items with me.

But what if things are time specific?

Yesterday, I had a small gathering of girlfriends. There was a particular list of things that had to be done in a specific order. Some food needed to prepped early, like the salsa, that tastes much better after spending some time in the fridge. Other stuff, like my sausage dip, had to be done at the last minute.

ASIDE: I use Pioneer Woman's salsa recipe. Google it. Simple and yummy.

TIP: Sausage dip is an easy, tasty dip. It is always a hit. One roll Jimmy Dean sausage, one 8 oz. cream cheese, and one can of medium Rotel. Cook sausage, add Rotel, and add and melt slowly cubes of cream cheese. Put in a small crockpot and serve with Scoops or tortilla chips.

In order to plan the day, I really felt like I needed a schedule. I yearned for the order of little blocks of time.

So I made one.


I put the order of things on the page and just highlighted as each thing got done.


TIP: Highlighting things as they are complete makes the incomplete items jump out at you.

I just printed extra copies of this to use on busy days, for parties, and for important days like the first day of school. I hole-punched those to stay in the back of my planner.

Join the planning and life management conversation on Facebook at Giftie Etcetera's Facebook group. I look forward to chatting with you and the friends that you invite.

Etcetera.

Friday, July 25, 2014

Planners and Ticklers

To be clear, today's blog is not about the Fifty Shades of Grey trailer.

Ticklers, for those of you with dirty minds, are 12 files (one for each month) and sometimes 31 files (one for each day in a particular month). Say I have a letter that needs to be mailed every January. I put it in the January file, and when January comes around, I check the file and mail the letter.

For those still thinking about Mr. Grey after that very un-sexy explanation of ticklers, well, there is no hope for you. :)

Yesterday, a friend asked me about my ticklers. (Again, perfectly APPROPRIATE question. Get your mind out of the gutter!)

(You can ask me questions and get into fun discussions with fans of my blog by joining the Facebook group Giftie Etcetera - Planners, Planning, and Organizing today. Don't worry - we keep posts family friendly.)

I don't really have tickler files.

And, yes, I am still a lawyer. And, yes, lawyers do love their ticklers. I never really understood the fascination, though.

If you keep a great calendar, you don't need to file stuff by date. And as a lawyer, especially, I wanted everything belonging to each client in their client file at all times. Plus, why maintain FILES and TICKLER FILES? I value simple solutions, so tickler files just don't work for me.

In the meantime, I do borrow lots of concepts from tickler files. For example, if I have an equal amount of time to work on a task, I work on the one due next first. And I always put everything coming up in one place. But, for me, that place is in my planner. Finally, I put things in my hold box in date order.

Here's how I deal with pieces of paper that do NOT fit in my planner, since I don't really use a tickler file. (Note: If paper fits in my planner, it just goes there.)

First, I have the tools for processing paper conveniently available.


I have a simple clipboard that opens up to a legal pad to use as my in-box and portable hold box. I added my own binder clips to use as a portable hold box. I'll show you exactly how I use those later. Of course, you could do a more professional or fancy clipboard, but mine only costs $3 on clearance and I work from home so appearance is unimportant (or I work in coffee shops - hence to easy to move clipboard instead of a normal in-box).

Next I have a magazine sorter. The back slot is the to-be-filed area and the front slot is my tickler/hold box.

Incoming mail, documents, and papers go on the outside of the clipboard. Note that I think an actual in-box is a better solution for most people. But I work remotely a lot, so this way I can bring stuff with me.


I go through each piece of paper one at a time.

I either:

-do the task;

-delegate the task (by putting it in my husband's in-box);

-delete the task (by tossing the paper); or

-hold the task (by marking a time to do it or check on it in my planner AND putting it in the appropriate file if it is for more than three months away, putting it my portable hold area if I plan to use the paper outside of the home, or putting it in my magazine box hold area if I will use it at home).

I try to only hold a task if I HAVE to, either because it involves so many steps that I just cannot do it now or because I CAN'T do it right now.

TIP: Put a sticky note in the upper right hand corner with the due date and name of the paper. That way, when your planner tells you to do the task, it's easy to find.

For example, I am making a craft project for my sister's baby (expected in November). I mark it in my calendar, then put it in the hold box.

TIP: Put them items in date order.


If something will be needed outside the home (like this report for school), it gets clipped inside of my clipboard.

Note: Many clipboards come with inside pockets so that you do not need to use your own clips.


Once my papers are processed, my desk closes up neatly.


Etcetera.

Wednesday, July 23, 2014

Planner Weight Loss (For Me, Not My Franklin Covey)

As I wrote today's title, I realized that my planner is getting a little thick and could stand a good purging. But the extra blubber on the planner isn't going to kill anyone. My waistline, on the other hand...

I recently hit the highest weight of my life. The number was bad. It started with a 2. I'll just pause and leave you with THAT reality for a second.

...

...


...

I am determined to get the weight off, and my planner and the My Fitness Pal app are my tools for winning this fight!

This post overviews all the ways I use my planner to lose weight.

NOTE: I don't have a "diet" section in the planner. That's because eating healthy and exercising are involved with almost every aspect of my life. Household management to make sure I buy the right foods and have a clean kitchen, planning work times so I can exercise, and knowing my schedule so I can plan meals are all important parts of losing weight.

*A breakdown of daily calorie goals stares at me when opening the planner.


Let's face it...if you tell me that I have 1,800 calories (yes, that amount is pretty quick weight loss when your weight starts with the number 2), I will eat 1,800 calories before noon. This way, I can realistically determine that cafe' au lait, oatmeal, and one slice of center cut bacon is enough.

*I generally put calories in the My Fitness Pal app, but if my phone is recharging, I jot calories consumed on the dashboard of my planner.


*I list groceries to buy on the shopping list.

Look at all those veggies.


*I schedule group workouts and weekly shopping trips on my monthly calendar.

This school year, I am organizing a walking group a couple of times per week in a park near the school right after daily carpool.


I also schedule shopping so that I don't eat junk just because I am out of food.

*I jot (in a highlight color) a daily time plan on the weekly calendar, including time to exercise.


*I have a log of fruits and vegetables consumed on my weekly pages.


*I have a task to sign up for the YMCA on my weekly task list.


The truth is that I haven't signed up yet because I fear I'd waste the membership, between the new walking group, home workouts (usually with a step and weights), and friends working out with me in the park.

*I have a weekly menu on my weekly pages to plan healthy meals.

*My weekly goals' sticker includes exercise and eating fruits and veggies.


*I list exercise and healthy snack ideas in the files section of my planner.


Those are all the ways that I organize my health journey. So far? 5 pounds down since February (but I only got serious in July).

Don't forget to join our conversations in my group on Facebook: Giftie Etcetera - Planners, Planning, and Organizing today!

Etcetera.

Tuesday, July 22, 2014

A Big Announcement: Personalized Planning Chat With Giftie

I am a member of many Facebook groups and I love each one. I try to be active (logging in at least once or twice a week) and I learn so much from the people in each group. (In particular, I love my DIY peeps, Philofaxy, and Peace people. You know who you are. The Southern Ladies are pretty cool, too. Oh, and the Franklin Covey group.) (You see what I mean?)

But no one group accurately reflects the stuff that I talk about on my blog. After all, planner groups only talk about planners. Organizing groups only talk about organizing.

But I don't manage a planner. I manage a life!

I work (part-time, but a serious lawyer job). I am a stay-at-home mom (at least during the summers, when my school age kids are in class). I plan to create order in my life! And there is a need for a Facebook group to discuss that. We all, even serious Plannerds, need that general place to tackle planners, routines, systems, cleaning, dealing with family members, and all the other order issues in our lives. 


I have a solution.


Giftie Etcetera - Planners, Planning, and Organizing is a new Facebook group that I created JUST FOR YOU! Come talk about your order problems and solutions with us.

I will approve people who ask to join. Just click Join Group and give me a day or two. (Spammers will be deleted quickly, as will anyone posted off-topic repeatedly, soliciting, or selling things to members.)

Tell your friends! They can join us for some personalized planning chat.

Etcetera.

Monday, July 21, 2014

Order Revisited

I've talked about the Order Of Things before. Things often need to be done in a specific order so that you can save time and stay organized.

Today, I had to put mail into a self-seal envelope. In particular, I had written a check to pay back a friend for my portion of a shared hotel room. I needed to mail the check to my friend.

I pulled off the seal cover first, BEFORE putting the check into the envelope.


Yes, you guessed right. I accidentally stuck the check to the envelope. I had to start all over with a new check and a new envelope. It costs money to buy checks and envelopes, but more important to me is the amount of wasted time, writing a second check and envelope. (Update: I was able to salvage the check, but not the envelope.)

Perhaps the name "Giftie" is more of an aspiration than a title. :/

Now, if I could only figure out the appropriate order so that the oven, dryer, and toaster don't all scream (okay, beep and pop up) at me at once!

Etcetera.

Thursday, July 17, 2014

Printing Planner Sized Pages From Letter Sized Word Pages

Full Disclosure: I don't know if this will work for everyone. But it worked for me, so I am sharing!

Additional Disclosure: Yes, I am a lawyer. How could you tell?

So, Plannerds, I made a cool discovery yesterday. My friend sent me the agenda for my mini-reunion this weekend with my residential high school suitemates. I was about to print it out and copy the times into my planner, when I stopped and thought, "wonder if I could print this in compact size?"

Third Now-You-Really-Know-I-Am-A-Lawyer Disclosure: The title of this post refers to planner size. In Filofax terms, a personal planner has pages that measure about 3 3/4 x 6 1/4 inches. I use a Franklin Covey compact (same holes as FF personal), which has pages that measure 4 1/4 x 6 1/4 inches. This should pretty much work for both sizes.

Turns out, the letter-sized agenda was typed in Word. I selected "Page Layout" then scrolled down to "4 x 6." I selected that size, printed, and cut with my paper cutter. I used a single hole punch and a spare sheet of planner paper to line up the hole punch.


Ta da. Agenda in my weekly spread.


TIP: Write notes, like flight info, directly on the agenda.

I also put my packing list there, since I am doing that tonight. Today's is hand-written, but in the future, I might type and just print out at this smaller size!


Also, I made a note over the blank weekly squares so that I force myself to look at the agenda.

This would be a good spot to use washi tape!


TIP: You see that I X'ed out the daily chores on my sticker chart for the days when I will be away from home.

I'll be in Atlanta for the weekend. It's okay to say that, since my husband will still be home with the kids, defending the homestead.

Final disclaimer: Please pray for my husband. He has a long, horrible weekend in front of him, all alone with the children!

Etcetera.

Monday, July 14, 2014

Expanding A Weekly Page To Capture All The Information

Yesterday, I was sitting at the IHOP with some girlfriends who had traveled across the country for a visit from California, Mississippi, Texas, and parts in between. Hundreds of miles of travel between the dozen of us, into Louisiana, a land known for its food and cuisine, and we ate at IHOP. (Shout out to the IHOP in Natchitoches, Louisiana. Good service, adequate food, and amazing tolerance for giddy 40 year old women. We did remind them several times that we tip well.)

Brunch marked the end of the midpoint of a month of crazy travel. Cozumel, Honduras, Natchitoches, and Atlanta will round out my summer adventure. I've been living out of suitcases and convenience stores. Imagine my surprise and delight when several of my girlfriends busted out their planners alongside their pancakes. (Also, imagine my embarrassment that mine was in my suitcase in the car.)

Each lady has a different style of planning. One had an almost empty planner, but a tablet full of spreadsheets tracking everyone in her company and their travel and projects. Another, a librarian, had one of my favorite planners. It was a skinny bound book (of course it was, as she is a librarian), complete with a monthly view for appointments and travel, and simple, lined, horizontal weekly set-up for tasks and notes. Each explained why they plan the way they do. I was so proud of both of them. My girlfriends are smart, but even more important, they know themselves. Their planners reflect that. No matter how much advice I give here, the key to using a planner is to make it work for you - for your habits, temperament, and life.

For me, weeklies are always the way to go for the meat of my planner. And Franklin Covey compacts are pretty portable, so the weekly/compact combination works. But after all the travel, I don't have enough room on one weekly two-page spread for what needs to be done next week. Still, my upcoming week isn't so busy that I need a whole extra page. With so much to do, I figured I'd share some tips for making a weekly spread capture extra information.

*Use found space at the top of the page to menu plan.


My weekly boxes, like the Monday box, hold due dates, must dos, and want to dos for each day. There is no room to write down a menu plan. But having an idea of what to shop for and cook is so helpful to a smooth week that I need it somewhere on the weekly spread. So my dinner menu goes right at the top of the page. ("Groc" means I am grocery shopping that afternoon and will eat something that I buy during the grocery trip.)


*Add a small piece of paper between the weekly spread so it doesn't hide the main tasks, but can list tasks that must be done this week, but on no particular day.


*Write notes from the weekly tasks on the back of the small piece of paper.

*Use the upper right corner to put a sticker with repetitive, daily tasks.


*Write other people's tasks to track in the notes box at the bottom of the page.

I would NEVER buy horizontal weeklies without a blank notes box.

*Use the notes box for, well, notes.

Mostly, I use the notes box for things like confirmation numbers when I book a flight, phone numbers/addresses of places I am going this week, or any information that occurs that I might need a record of later.

These tricks make a weekly spread big enough. Any bigger, and I'd need a full-time assistant. Since I cannot afford a personal assistant, I won't be moving to daily pages.

Etcetera.

Sunday, July 6, 2014

Repetitive Tasks In A Planner: A Sticky Solution

For the most part, if there is a repetitive task in my planner, I circle it. I know that if a task is circled, whenever I complete it, I did to recopy the task to the next time it must be done.

For example, trash to be put out every Tuesday is listed on the next upcoming Tuesday. The word "trash" has a circle around it. Once I take out the trash, I recopy (and re-circle) on next week.

This technique works fine for occasional, weekly, and monthly tasks. But what about daily or almost daily tasks or goals? I can't write them all on each day, or the page is too cluttered. And I can't just not write them, or I fail to factor them in or forget to do them.


My solution? Printing stickers for daily tasks and goals.


I just used some old name badges (but mailing labels would work, too).


I used the Avery on-line templates to create my own stickers.


Then I printed and cut them to size.


One page of name badges made 16 stickers. That's 16 weeks of goals. I only did the one page, in case my goals change between now and then.


Just for the curious among you, these goals are exercising 6 times a week, eating 6 fruits and veggies per day, and doing my AM and PM routines.

I also made a sticker for during the school year, when the kids have to get ready in the morning (school bag, water bottle, snack, and lunch) and do things every afternoon (homework, chores, process folder, and put snack/water/lunch containers in the sink).

Also, I'm only putting the stickers on during my weekly review. Again, that is to give me a chance to change my mind about what is on the sticker (say, if my workout goal changes due to an injury).


If there are only certain days when I plan to do something, I use an X on the unplanned days. Once I do the task, I circle it.


The stickers fit in the back of my planner easily without taking up much space.


So simple. So effective.

What do you use stickers for? Do you make your own?

Etcetera.

Saturday, July 5, 2014

Planner Basics: How To Use A Planner 101

***This post may contain affiliate links. See my "Disclaimer" link for additional details.***

Planner virgins often ask, "how do I start?"

There are TONS of sites out there talking about which planner to choose (like bound/unbound, horizontal/vertical, weekly/daily, etc.).

But what happens, Day 1, when that package arrives at home, you dramatically (particularly if you are considering a second career as a You Tube star) unbox your planner, and you get out an ink pen? 


(First, if you are smart, you'll get out a pencil or erasable pen instead. I particularly like FriXion Erasable Gel Pens. True ink is not for newbies. Or for chickens like me, for that matter!)

I've written about this before, but I thought a practical walk-through of the really critical decision-making might help planner newbies.

1. Write down appointments in a DEDICATED spot.


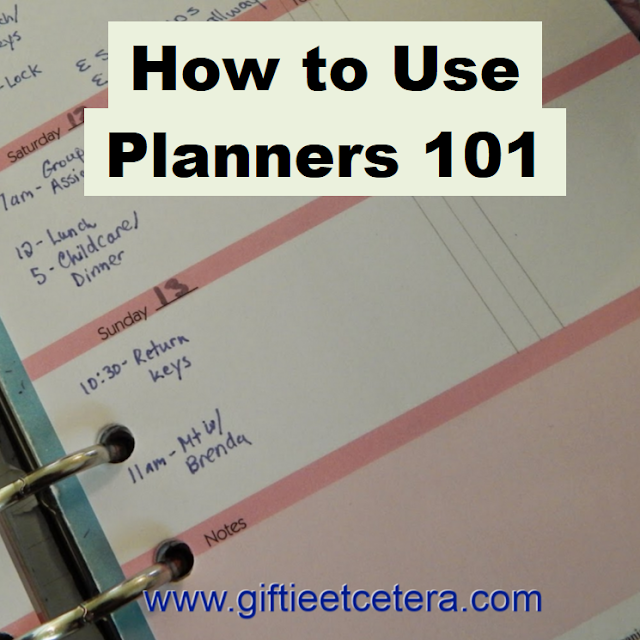
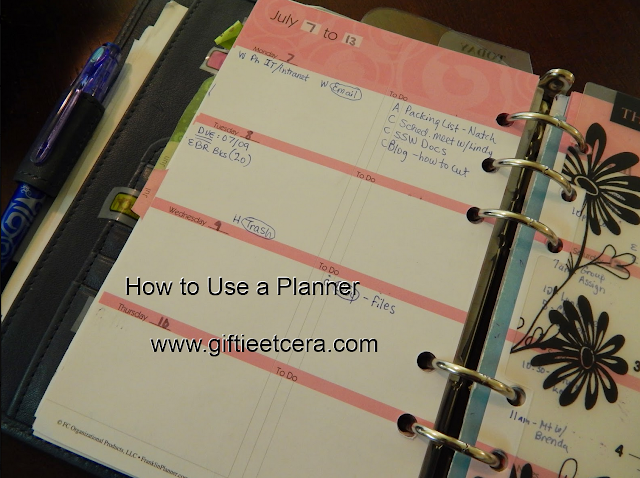
Some plannerds write all appointments on the daily or weekly pages. If you do that, have a dedicated spot on those pages for appointments. See how I keep all appointments to the left column in these weekly pages? This works especially well for people with lots of appointments. People with a ton of appointments likely need daily appointment pages.


How to Use a Planner


Others (like me in my real not-a-blogger life) use monthly pages just for appointments and set time items. 

(Oh, July, you are not supposed to be this busy! You traitor.)


planner, planners

It's key here that you DEFINE appointments for yourself. This decision is not as obvious as it seems. It should include time-specific stuff, but generally not tasks.


Sure, having a doctor's appointment at 2 p.m. is an appointment. But what if I have to turn in the key to the event coordinator at 10:30 a.m. because he has church at 9 a.m. and a luncheon at 11 a.m., and that is the only time when it can be done? Then, turning in the key IS an appointment.

For the most part, wanting to wash the car is NOT an appointment, unless the task involves someone else and the time is preplanned.

I do add grocery shopping to my appointments, simply because it is very day specific for me (if I plan to shop on Tuesday, I generally run out of food late Monday) and takes up enough time that I need to see it, visually, on my appointment list so that I do not schedule too many other appointments that day.

Once you define your appointments, it is much easier to manage tasks. You can see, visually, how much time is left.

2. Split tasks into two groups. 


One group, must dos, goes in a dedicated spot. The other goes, well, elsewhere.

The reasoning behind this split is that MUST DOS are critical to keeping your life in order, while SHOULD DOS or WANT TO DOS just make life easier.

Now, each person must make this very personal decision for themselves - what is a critical task and what is not.

Next week, I have some critical tasks listed already.


planners, planner

The tasks that are critical next week include dealing with IT for work, taking out the trash (sure, it's routine, but it only happens once a week and if we skip it, bad things happen), and seeing my already-a-month-old-and-I-still-haven't-met-her newborn cousin.


Note that I further divide my critical tasks into a three-part ranking, much like the ABC ranking sometimes suggested for prioritizing tasks. I use a three column set-up, with DUE tasks in the first column, important tasks in the second, and tasks that do not need to be done that particular day but must be rescheduled if not done in the last column.

Basically, the first column will get done. The second will get done unless we end up at the hospital for some emergency. The third column, things like making a packing list before the weekend, will get done or rescheduled or assigned out to someone else.

Things that occur to me to do, but aren't as important? They go on a Master Task List, elsewhere in my planner. There is no reason to clutter up the meat of your planner - the appointment area (for me, monthly calendar) and the task area (for me, weekly calendar) - with my random thought that I should inventory the deep freezer or make an emergency tote bag. Sometimes, I get inspired and do those SHOULD DOS. But they are not the daily workings of my life and do not deserve to occupy the most important space in my planner.

3. Carefully consider your tabs/categories.


Most planners come with pre-done tabs. Mine came with things like Work, Home, Calendar, Tasks, and Addresses. No offense to planner creaters, but those suck. I work at home part-time, blog (not quit work, but not home, either), and I keep addresses electronically.

Your planner tabs should be defined BY YOU instead of defining you. So I rearranged the tabs to fit my own life.

If you do not click on any other link, click this one and find out my categories. They are flexible, keep non-critical stuff off of my main pages, and put the calendar parts in the center of the planner, where physical writing is easier.

There are also numerous You Tube videos on planner set-ups.

4. Use blank/lined pages to jot random stuff.


Stuff will come up that you think you should use your planner for, but you are not sure. Jot that on some blank pages.

For example, "I wish I had a list of meds for my doctor next time," or "I forgot Joan's birthday on the 16th." "Record workouts" is another common one. I have found that one is pretty useless if I don't actually do the workouts, sadly.


5. Set up a goal date, maybe in a month, to add other sections to your planner.


Do not add everything now unless you are ABSOLUTELY CERTAIN that you need a new section. It's tempting, but focus on  the meat of your planner - the appointments and tasks. In a month or so, you will have a better idea of what your planner is missing and you can add it then.

TIP: Go ahead and write that task (update tabs/planner sections) in the next month of your planner.


If this post has helped you, feel free to subscribe to my e-mail or add me on Google+, and share on social media with friends who need help with their planners. 


I welcome comments and new plannerds. Oh, and in case you wondered, this was serious Planner Porn, so you are no longer a planner virgin. ;)

Etcetera.

Thursday, July 3, 2014

Making My Own Planner Pages

For calendars and weekly pages, I am a fan of pre-made inserts. (Specifically, I like Franklin Covey Compact undated Flourish inserts. Colorful, with lots of writing space and a great horizontal weekly layout.)

But for a while now, I've been using graph paper, two-sided, as my dashboard and scratch paper. It's cheap to print and easy to measure and cut.

Yesterday, I decided on a simple tweak that makes the pages look less busy, but still gives me the elegant lines of graph paper to work with.


Basically, I only print the graph paper on the back of the page.

The result? Perfectly straight, orderly writing, clean pages, and a happy planner. In this picture, you can see how the graph lines are viewable through the page, but faded since they are on the opposite side from the writing.


Etcetera.

Wednesday, July 2, 2014

Organizing Tips And Tricks That I Learned On My Carnival Cruise

***This post may contain affiliate links. See my "Disclaimer" link for additional details.***

I had an amazing vacation on our family's seven day trip to the Caribbean on the Carnival Dream.

(This is not a Carnival sponsored post, by the way. Although, if the Beards wanted to give me a free cruise, I'd not refuse. :) )

We swam with dolphins, had lobster and snorkeled on French Key Island, and, because of the AMAZING Camp Carnival, enjoyed adult-only dates most nights while the kids had a blast playing with friends.

TIP: If your kid is going to Camp Carnival, bring running shoes. They will need them for dancing on slippery ship's floors.

But, being the organizer that I am, I couldn't help but take notes for my blog of the things that the ship did so well as far as organizing and time management. Yes, I brought a travel notebook with me for that purpose!

I've traveled to expensive, swanky hotels that do not even touch the level of service and order that Carnival provided.

The layout of the room lead to being organized, even in a small space.


Basically, each kid had a bunk and mom and dad had a king bed. It's hard to see, but there was a side table next to each side of the grownup beds and a drawer under the bunks for each kid.

At home, I also have side tables, so I was used to using those for my water bottle, paperback book, my nightly medications, and my sleep mask. But it had not occurred to me to have similar spaces for the kids. They used the spaces for stuffed animals, pjs, and books. Brilliant, Carnival. Kids need bedside tables (or drawers, in this case), too.

There were also four small drawers and four large cubbies in the closet. Each person in the family got one. Our drawers held things like our room keys, sticky notes for leaving each other location information and leaving notes for the room steward, and the cell phone, while our cubbies were used for swimsuits, t-shirts, shorts, life jackets, books, and anything else we needed. Hanging clothes went in the other two closets. I tucked suitcases under the beds.

TIP: The oldest person gets the top shelf, and then the other shelves are assigned in age order, until the youngest. Each person is responsible for keeping his shelf orderly.

TIP: If your child is five years old or younger, Carnival will provide a free cell phone that works with any other phone on the ship.

One thing Carnival did not have were over-the-door hooks for hanging wet swimsuits. The swimsuits had to be hung on the clothesline in the shower. I wish I had packed over the door hangers.

I peeked in at the room steward and housekeepers cleaning our room once. (Not on purpose, I swear! I forgot something and had to run back to the room.) First, they sweep the room for trash. Once it is all discarded, they start actually cleaning. It's much more manageable if you toss trash first.

TIP: At home, toss trash and put things away in their homes before cleaning up.


Carnival's room service menu read like the breakfast or lunch menu at my house. Basically, they listed some basic snacks (veggies, fruits, cookies) and sandwiches or cereal. 

TIP: Have a room service menu for your home. Prep fruit and veggies on grocery day and "order" from it when you are pressed for time instead of cooking a meal.

At lunch and dinner, Carnival set the tables for the next meal as they cleared them. Admittedly, this trick won't work at my house, as my house is tiny and we need the table for homework and computer work. But if you have a table just used for eating, steal that trick!


Carnival also used appetizers (like cold shrimp cocktail and salads) that were yummy and healthy, but pre-made. I plan to start doing something similar every three days or so at home. Having something quick to eat when dinner is being prepared will head off much crankiness.

We had a blast and I can't wait to cruise again.

BONUS TIP: Do not buy Fun Freddy in the gift shops (about $10). He's much cheaper at Beary Cuddly classes (running about $7 and by far the cheapest Beary Cuddly bear available).


Etcetera.